Canvas confetti effect (Part 2): Adding realism
Welcome to the second part of the confetti series. In the first part we went over the basics of the effect and how it works. In this part we’ll focus more on the appearance and movement of each particle to achieve a more realistic looking confetti. So let’s get into it.
The first change we’ll introduce is in how we are firing our particles. If you recall from the first part, in order to fire the particles upwards we simply added a negative Y velocity yv. While this works it doesn’t look very realistic, what we’d want to do is fire our confetti with a cone shape, giving it a natural, scattered appearance.
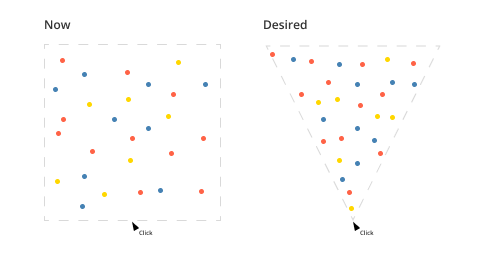
To achieve the cone-shaped effect in our confetti animation, we’ll continue generating random vertical velocity (yv). However, we’ll adjust our horizontal velocity (xv) based on this, allowing particles to travel wider distances horizontally as their vertical speed increases. This will help us achieve the natural firing shape we are looking for.
Let’s start buy introducing a new constant value that we’ll use to play around the spread angle of the cone.
const FIRING_SPREAD = 20;
Now we’ll update the Particle’s constructor to generate the velocities that we want. First we convert our constant firing spread to radians, this is because trigonometric functions in JavaScript expect angles to be in radians, not degrees.
const radFiringSpread = FIRING_SPREAD * (Math.PI / 180);
Next we’ll create a random angle, we use Math.random to create a random number between 0 and 1 and multiply it with our firing sread. This gives us a andom angle within the cone. We’d like to ensure that particles spread upwards to we use the negative sign at the beggining.
We’ll also want this angle to randomly be positive or negative, so we simply multiply that result with anther random -1 or 1. This ensures that the angle spreads in both horizontal directions.
const randomAngle = -(Math.random() * radFiringSpread) * (Math.random() < 0.5 ? -1 : 1);
With our random angle we can now generate the particle’s velocities. As I mentioned earlier, the vertical velocity yv will remain the same, a random negative number.
For the horizontal velocity xv we’ll start by using the Math.tan() method to get the tanget of our random angle. We multiply the tanget with the vertical velocity to determine how much the particles should move horizontally. We’ll also use Math.abs functio because it retuns the absolute value of the vertical velocity, we need the absolute value because because we’re interested in the magnitude of the vertical velocity, not its direction.
this.vy = -(Math.random() * 12 + 9);
this.vx = Math.tan(randomAngle) * Math.abs(this.vy);
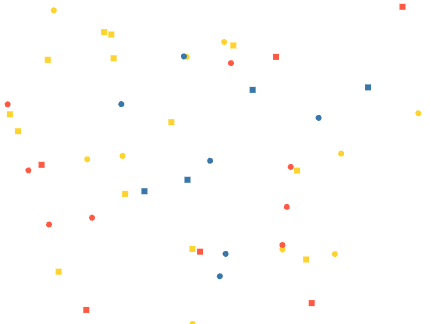
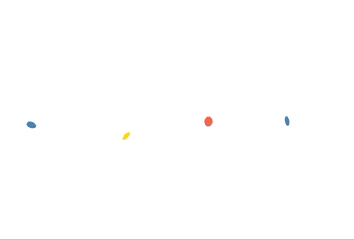
🎉 Now the firing animation is much more realistic, but it’s far from perfect. Right now our confetti particles are just circles (arcs) with the same radius, we’d like to add more shapes bringing more life to our animation.
For this we’ll have to update once again our Particle constructor and add a new property called shape. Additionally we’ll return a random string rectangle or circle to determine which shape this instance will use.
class Particle {
  constructor(options) {
    ...
    this.shape = Math.random() < 0.5 ? "rectangle" : "circle";
  }
}
Now that each instance has a defined shape, we need to update our draw method to check if our shape is a rectangle and use the rect method to draw it.
The rect method is very straighforward, it only expect the following properties (x, y, width, height), for now we’ll use the same width and height.
draw() {
  ...
  if (this.shape === "rectangle") {
    context.rect(this.x, this.y, 6, 6);
  } else {
    context.arc(this.x, this.y, 3, 0, Math.PI * 2, false);
  }
  ...
}
Great! now we have multiple shapes but they are also very static. In real life confetti particles spin in both directions as they move and that’s what we want to do as well.
First we’ll rotate the particles in the Z axis, basically clock or anti clockwise. For this we’ll want to store the angle rotation of each instance and also the speed at which each particle rotates. The speed will also be either positive or negative to determine if it’s going to rotate clockwise or counter clockwise.
class Particle {
  constructor(options) {
    ...
    this.rotationAngle = Math.random() * Math.PI * 2;
    this.rotationSpeed = Math.random() > 0.5 ? 0.02 : -0.02;
  }
}
With the rotation angle and the speed in place, we’ll want to modify our update method to increase the rotation angle every time.
class Particle {
  update() {
    ...
    this.rotationAngle += this.rotationSpeed; // Apply rotation speed
  }
}
Finally, we need to use this rotation when we are drawing the particle so let’s change our draw method now.
The first thing we’ll have to do is saving and restoring the state. This allow us to preserve the current state of the canvas before making any transformations, and then restore it back to that saved state afterward. This is crucial for maintaining the integrity of the canvas and preventing unintended side effects.
draw() {
  context.beginPath();
  context.save();

  // draw element

  context.restore();
  context.closePath(); // Close the path (optional)
}
Now to actually rotate the element we’ll use the rotate method, which only takes the angle in radians as a parameter. But there’s a catch ⚠️ “the rotation center point is always the canvas origin”. This basically means that if we rotate our particle using rotate(this.rotationAngle) they will not rotate in place.
In order to make this work, before applying any rotation we have to move the origin or matrix to where the particle is. First we need to know where the center of our particle is simply using the position and the size and then use the translate method to move the matrix there. We’d want to apply our rotation and then translate the matrix back to where it was
draw() {
  ...

  // Calculate the center point of the rectangle
  const centerX = this.x + this.size / 2;
  const centerY = this.y + this.size / 2;

  // Matrix transformation
  context.translate(centerX, centerY);
  context.rotate(this.rotationAngle);
  context.translate(-centerX, -centerY);

  if (this.shape === "rectangle") {
    context.rect(this.x, this.y, this.size, this.size);
  } else {
    context.arc(this.x, this.y, this.size, 0, Math.PI * 2, false);
  }

  ...
}
You can see that I’m also using a this.size property instead of hard-coding the radius or the size of the rectangle.
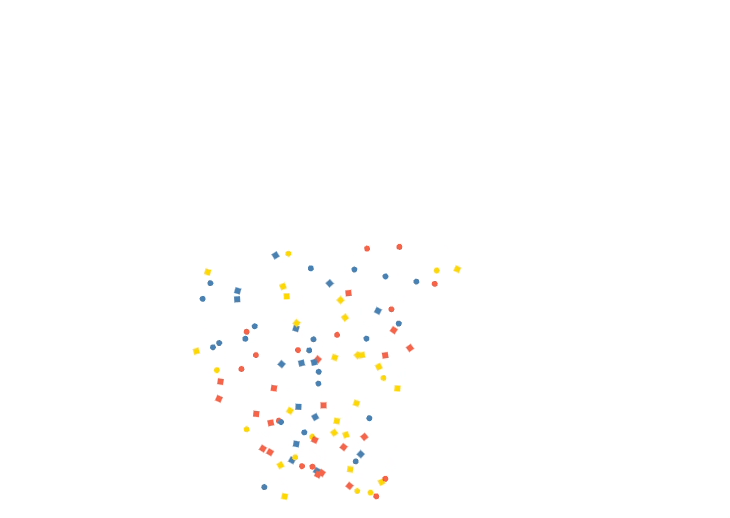
Great! our particles are rotating in the Z axis now, of course we cannot see the circular shapes rotating but that will change soon.
Now we would like to make our particles rotate in other axes as well, but how do we do that if we are using a 2d context?. Well, the answer is that we are not going to actually rotate them, we are only going to change one of the sides so it creates the effect that they are rotating.
If you look closely, it appears that they are rotating in the Y axis, so let’s start with the circle and then we’ll apply the same concept to our rectangles. Right now we are using the arc method but it doesn’t allow us to declare 2 sizes, so we’ll need to change it and use the ellipse method instead.
context.ellipse(this.x, this.y, this.size, this.size, 0, 0, 2 * Math.PI);
As you can see, we are using the same size for both the radiusX and the radiusY but we’d like to track them separately so we can change them and create the effect that we are looking. Let’s update our constructor to include these radii.
class Particle {
  constructor(options) {
    this.radiusY = 5;
    this.radiusX = 5;
    this.shrinking = false;
  }
}
I also included a shrinking property, we’ll use it to determine if we want to increase or decrease the radius. Let’s do that but modifying our update method.
update() {
  ...

  // Adjust the radiusX value based on the shrinking state
  if (this.shrinking) {
    this.radiusX -= 0.2;
  } else {
    this.radiusX += 0.2;
  }

  // Ensure radiusX stays within the bounds
  if (this.radiusX <= 0) {
    this.radiusX = 0;
    this.shrinking = false;
  } else if (this.radiusX >= 5) {
    this.radiusX = 5;
    this.shrinking = true;
  }

  ...
}
Let’s break this down, if the particle is shriking we reduce the radius and if not, we’ll increase it. We’d also want to make sure we are not making our particle bigger than they originally was, so we check if the radiusX if greater than 5 to reset the state and start to shrink it again.
Finally we just need to make sure that our ellipse method is using these new properties.
context.ellipse(this.x, this.y, this.radiusX, this.radiusY, 0, 0, 2 * Math.PI);

Now our animation is looking much better with the circled confetti particles rotation and moving on every direction. But all of our circles are “sycronized” rotating at the same speed and time, so let’s randomize the starting radiusX and the shrinking flag to make it more realistic.
class Particle {
  constructor(options) {
    ...
    this.radiusY = 5;
    this.radiusX = Math.floor(Math.random() * 6);
    this.shrinking = Math.random() < 0.5;
  }
}

You can see now this looks much better, so we’ll apply the same concept to our rectangle particles.
class Particle {
  constructor(options) {
    this.height = 10;
    this.width = Math.floor(Math.random() * 11);
  }

  update() {
    ...

    // Adjust the width value based on the shrinking state
    if (this.shrinking) {
      this.width -= 0.2;
    } else {
      this.width += 0.2;
    }

    // Ensure width stays within the bounds
    if (this.width <= 0) {
      this.width = 0;
      this.shrinking = false;
    } else if (this.width >= 5) {
      this.width = 5;
      this.shrinking = true;
    }
    ...
  }
}
And don’t forget to update the draw method as well
context.rect(this.x, this.y, this.width, this.heigh);

Now this is looking like real confetti! Let’s add some final details like adding additional colors to our preset
const CONFETTI_COLOR_PRESETS = [
  "255, 99, 71", // Tomato (Red)
  "70, 130, 180", // Steel Blue (Blue)
  "255, 215, 0", // Gold (Yellow)
  "255, 192, 203", // Pink (Pastel Pink)
  "173, 216, 230", // Light Blue (Pastel Blue)
  "255, 218, 185", // Peach (Pastel Orange)
  "240, 128, 128", // Light Coral (Pastel Red)
  // Add more colors as needed
];

And that’s it, we’ve made a confetti cannon and added a realistic movement to each particle. I encourage you to play around with the settings, shapes, and colors to get different looks or firing confetti in different ways or directions.
You can get the code for this pare here
In the next and final part of this series, we’ll clean up our code, write some tests, and improve the canvas rendering performance.
Until then, have fun and keep coding!